
Hello everyone!
I have been very busy with finals so I didn’t get the time
to share more updates with you. I have been making solid progress in the
project. I would say that the car electronics are pretty much completely done.
I am thinking I might ditch the proximity sensor even though I own one already.
I just can’t think of a good place to place the bulky sensor on the car’s body.
Here is what my proximity sensor looks like:

Picture of the Proximity sensor in question.
On the other hand, I have already started designing the
remote controller. If you remember, I had purchased an off-brand Xbox
controller. I actually changed my mind on that too and decided to base my
designs off of the original Microsoft Xbox 360 wireless controller. I was lucky
enough to get a controller donated to me from a game store (Huge thanks to Jeff
and his buddy!). I also bought a controller shell in which my PCB will go. It
is really easy to find design notes and spare parts for Xbox controllers since
they are so common. EBay proved to be the perfect place for looking up Xbox
controller parts.

Xbox 360 controller shell w/ parts I purchased.
However, the biggest challenge in creating a PCB that is
compatible with an Xbox controller shell is that the board needs to have
perfect dimensions and perfect hole/part placement. Also, the board has a
non-rectangular shape, so it is very tricky to get it right. There are many
obstacles on the shell so there are many keep-out zones I need to watch out for
on the board. Each fab run of this board at this size will cost me about $45-50
so I need to get it right on my first try. I cannot mess up the design, or
there will be very expensive consequences.
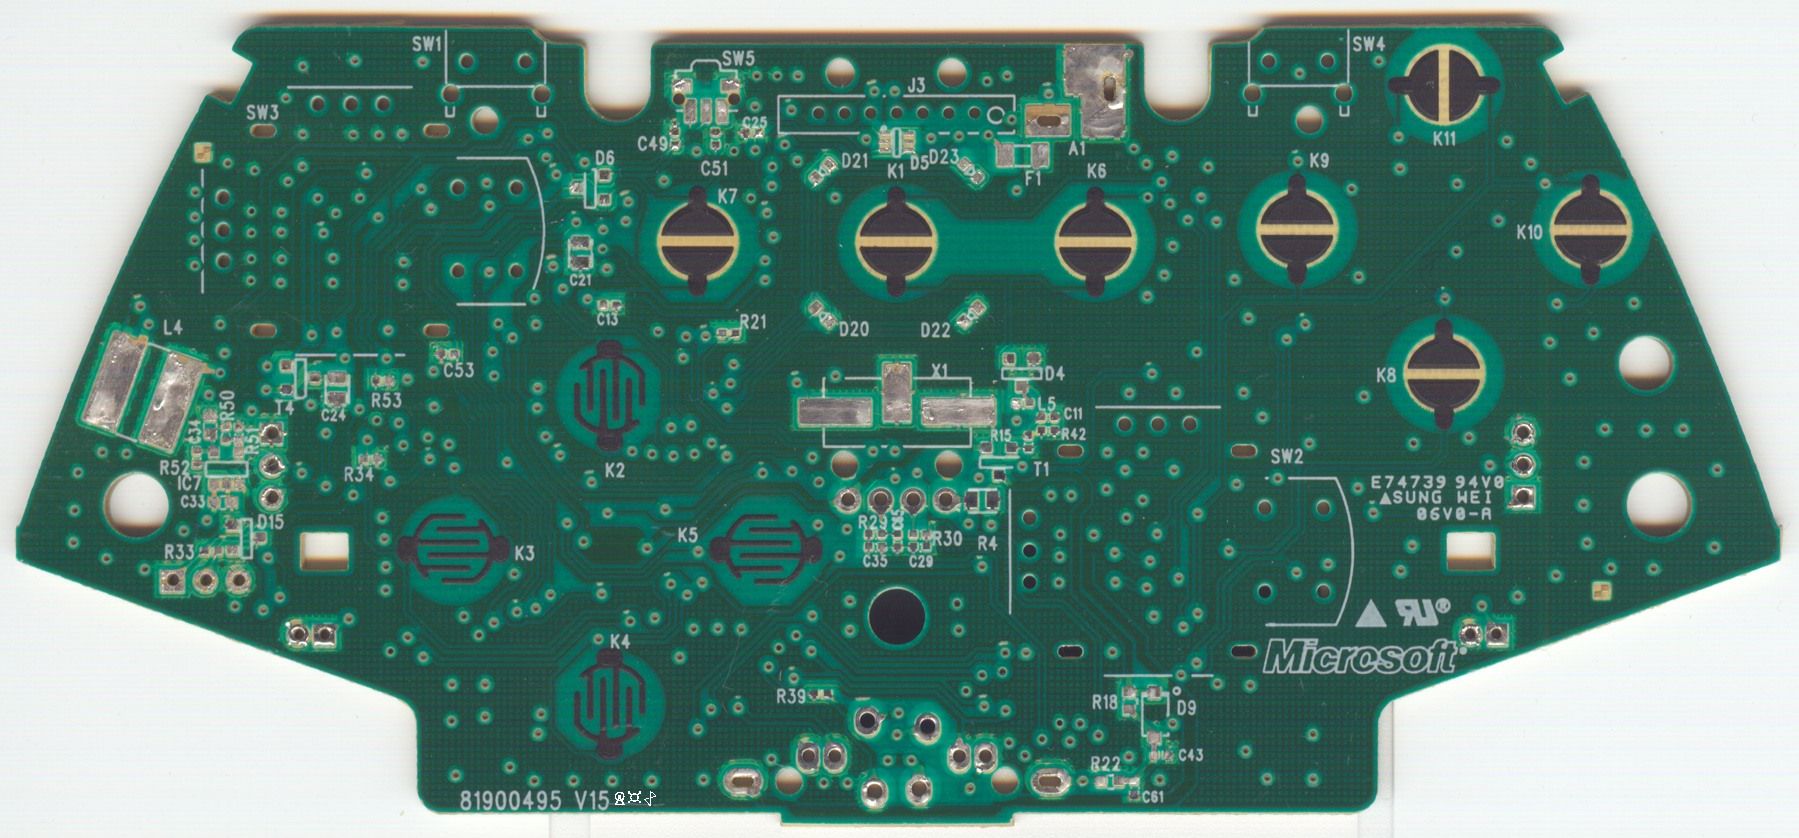
A scan of the Microsoft Xbox 360 controller PCB. (Source: RDC from Acidmods)
RDC on Acidmods.com has been very kind and has been helping me with
the design of the controller PCB. He has created an Xbox controller-compatible
PCB before so his knowledge is very insightful. I have also purchased one of
his boards called “36X controller” and have been referencing that when designing
mine. Because the dimensions are very tricky, I have been using MATLAB to
accurately retrieve measurements. It would be pretty much impossible to
retrieve accurate dimension measurements using a caliper from the actual board
with all the parts on it. RDC actually sent me a screenshot of his own design,
and using MATLAB, I am measuring the distance between 2 points at a time in
pixels. With a calibration measurement, MATLAB converts pixels into millimeters
which then I use in Eagle to place my components. As an experiment, I printed
out a 100% scale copy of my PCB from Eagle and laid it over RDC’s 36X PCB and
got a perfect match! All holes, critical components are exactly where they need
to be. So the MATLAB technique seems to be working great.

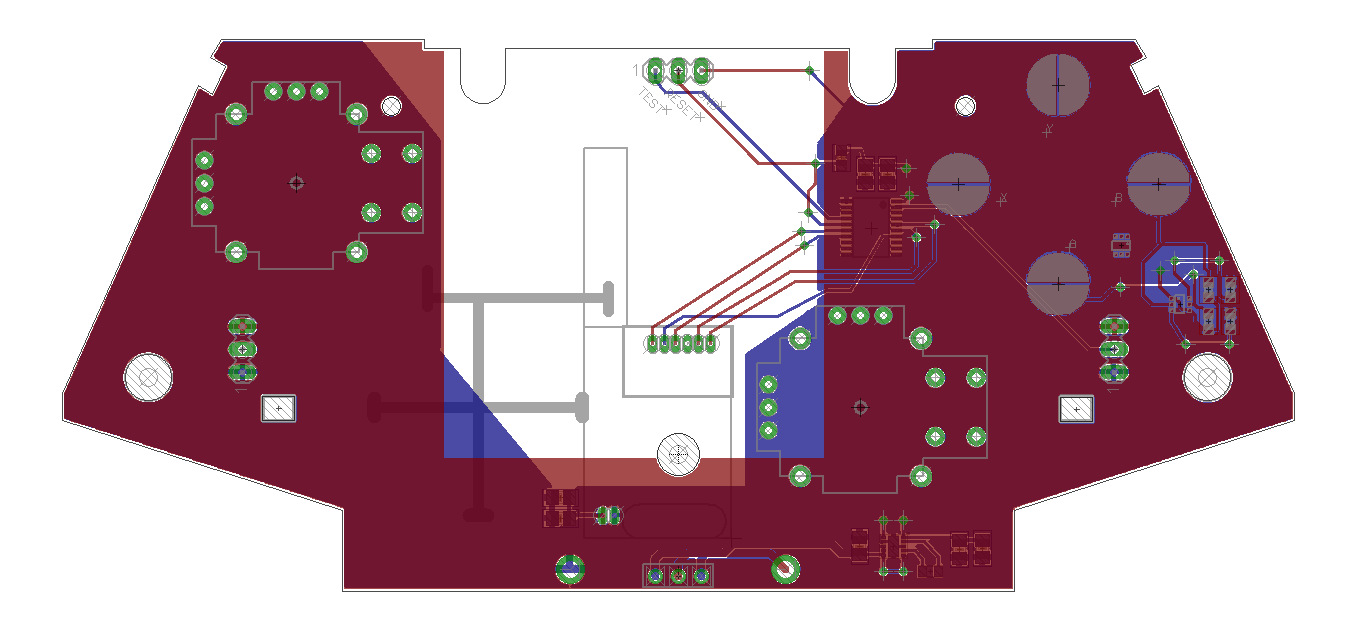
Screenshot of the current state of my remote controller PCB.
As for the car itself, everything is installed. There are
now 2 stand offs that hold the main PCB in place. Also, my super glue solution
for keeping the servo in place has failed. So my friend Jeff was nice enough to
drill some holes on the car frame so that we could screw down the servo in
place rather than depending on glue to hold screws down. You can never go wrong
with the old washer/screw/nut combination. Finally, all the LEDs are installed
and they work perfectly. They are very bright, and brake lights operate just
like they do in a real car. Jeff and I are currently considering installing
some police lights on the roof of the car just to make it more bad-ass. Lastly,
I will be sanding down the paint on the body of the car and repainting it. I am
thinking of painting it matte black, I think it would look very cool. And I want to leave you with these 2 pictures of the car, notice the lights!


No comments:
Post a Comment